Installation Guides
Getting your Webflow site talking to your Bread & Butter account is easy when you follow these steps.
Personalized user experience
With this feature, you can replace generic content with a personalized message that users only see once they have authenticated. For example, on your homepage, you can mention the user by name:
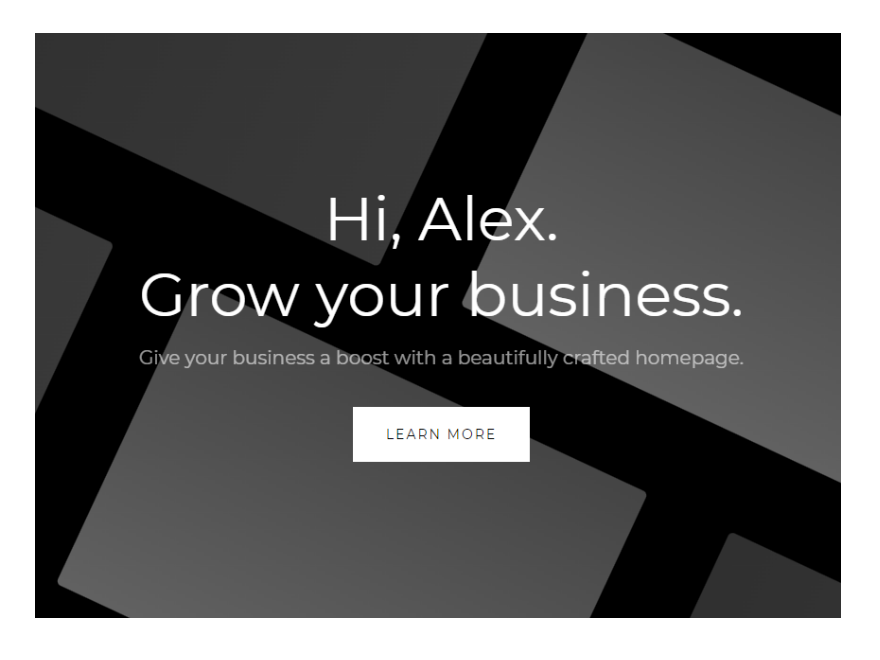
The available content to insert is First Name, Last Name, Full Name, and Email Address.
To set this up on your Webflow site, please follow these steps:
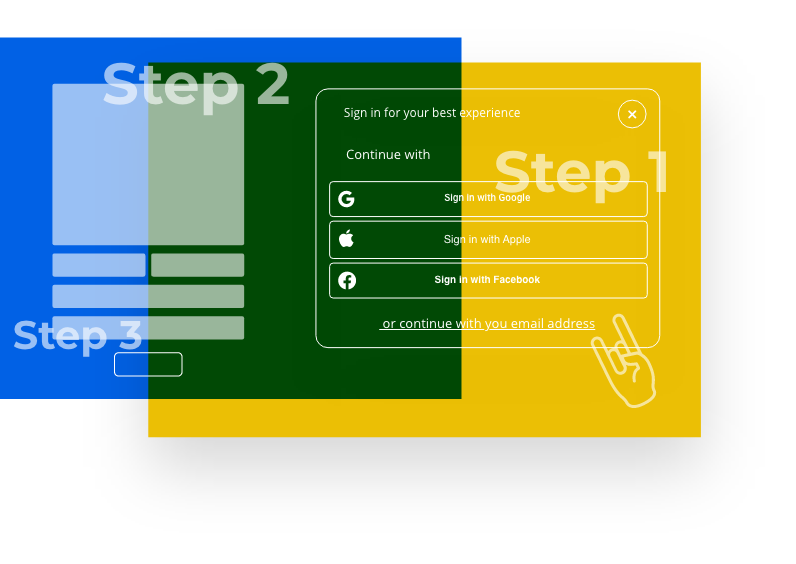
Step 1
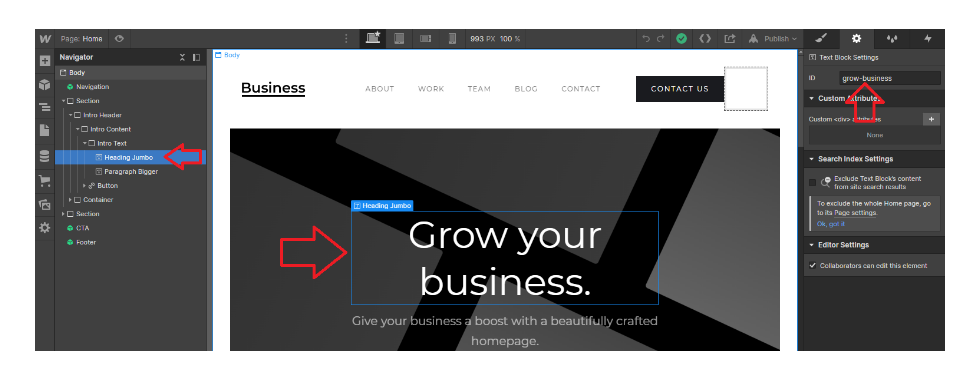
Find the text on your homepage, or other pages, that you want to personalize.
Select the text field. You can find the text field by selecting it on the page, or by finding it in the Navigator in the left menu.
In the right pane, click on the gear icon to go to Element Settings.
Then, set the ID to a unique value (eg: grow-business), and record it for use in a later step.
Step 2
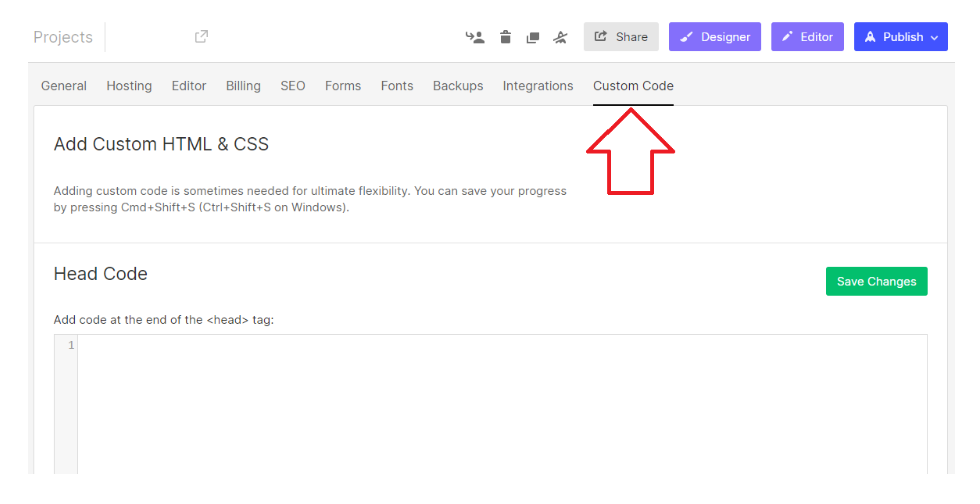
On your Webflow Dashboard, click on the 3 dots at the bottom right of your project. Then, select Settings.

Step 3
Select the Custom Code tab.
Step 4
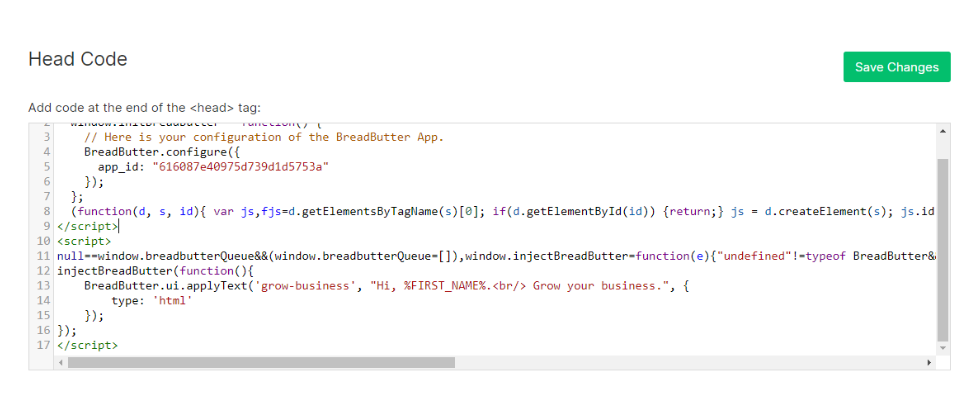
In the Head Code field, paste in the following script tag after the Bread & Butter initialization script tag:
Note: If you have other Bread & Butter feature snippets, just add this snippet below them.
Step 5
Replace FIELD_ID with the ID that you set in Step 1. Replace TEMPLATE with the new text that you want to appear when a user authenticates. You can use plain text or html, which must be specified in the TYPE below. The available customization fields are:
%FIRST_NAME%
%LAST_NAME%
%NAME%
%EMAIL%
Note: This will replace all of the text in the text field.
Replace TYPE with the content type: either 'html' or 'text'. Use 'text' if the content is just plain text. Use 'html' if you have included HTML tags in the TEMPLATE content.
Step 6
Click Save Changes. Publish your website, when ready.