Installation Guides
Getting your Webflow site talking to your Bread & Butter account is easy when you follow these steps.
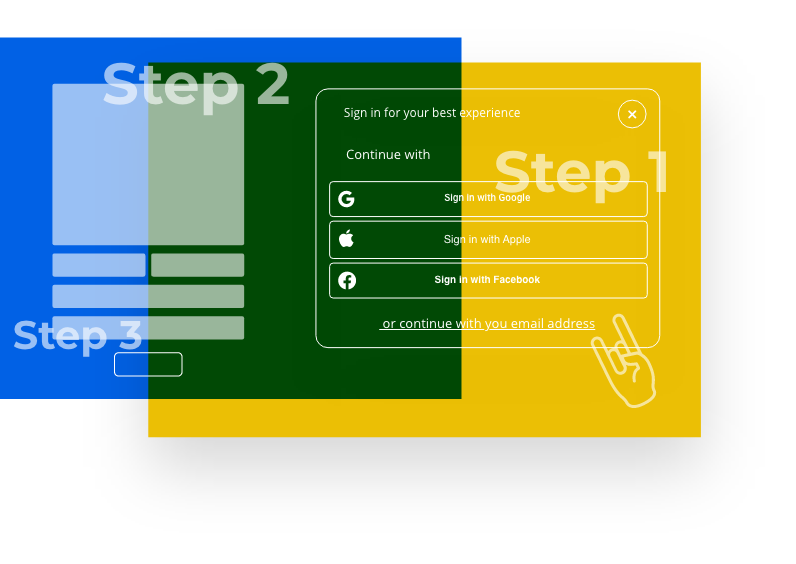
‘Continue with’ One-click conversions
One-click conversions make sure you have added the initialization script
This feature allows you to display Bread & Butter’s ‘Continue with’ tool on your website:

Your visitors will now have the option to convert with one-click using the social accounts you make available to them. Once converted, the first and last name, along with the email address is recorded in the user journey of each visitor, available in the Bread & Butter dashboard. This data can then be exported to your favorite CRM such as Pipedrive.
Note: By default, the ‘Continue with’ widget appears at the top right corner of the browser window. You can update the position of the widget in the browser window by following the instructions below. The widget is also enabled with the five most common social accounts, in sandbox mode so that you can get started right away. You can manage the sandbox accounts, along with other settings in the Bread & Butter app.
Step 1
On your Webflow Dashboard, click on the 3 dots at the bottom right of your project.
Then, select Settings.

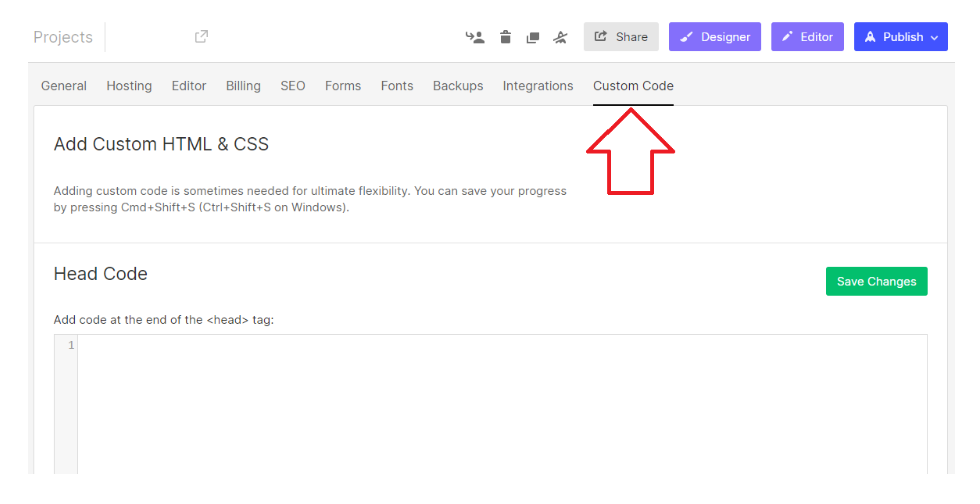
Step 2
Select the Custom Code tab.
Step 3
In the Head Code field, paste in the following script after the Bread & Butter initialization script:
Note: If you have other Bread & Butter feature snippets, just add this snippet below them.

Step 4
Click Save Changes. Publish your website, when ready.