Installation Guides
Getting your Webflow site talking to your Bread & Butter account is easy when you follow these steps.
Gating content at a directory / web page access
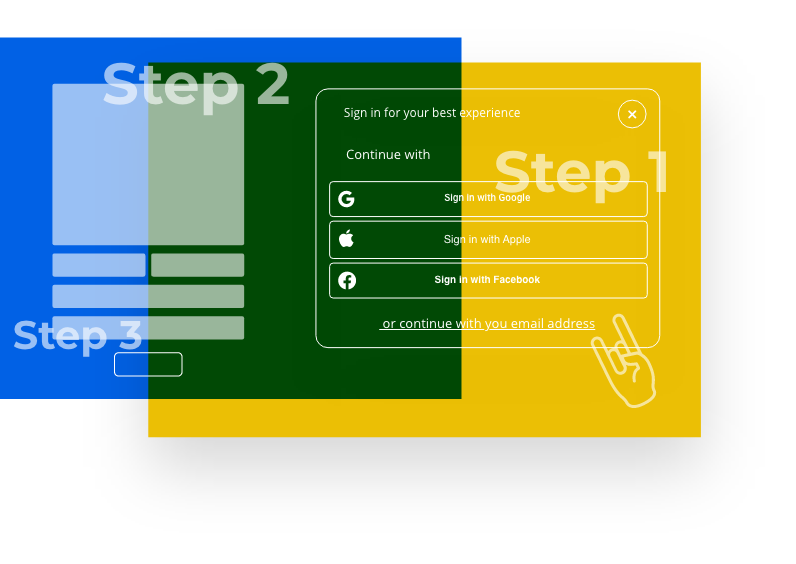
Bread & Butter’s content gate feature allows you to limit access to specific web pages on your website to visitors that have converted (ie: authenticated users only). If a user clicks on a link in your website to the gated webpage, the ‘Continue with’ widget will prompt users to convert or sign in, focusing the visitor’s attention to the next steps required.

If a user tries to go directly to the gated webpage URL from an external link, or by typing it in their address bar, they will be redirected to a different page that you must specify in the script (see steps below).
Note: You don’t need to add the ‘Continue with’ widget snippet for the Content Gating widget to work. The Content Gating widget will launch the ‘Continue with’ pop up on its own.
Before implementing this option, you’ll need to set the Destination Domain Allow List in the Bread & Butter App Settings:
1. Log in to to your Bread & Butter Dashboard: https://app.breadbutter.io/sign-in/
2. Go to App Settings in the left menu.
3. Scroll down to, and expand Destination & Callback URL Allow Lists (Advanced).
4. For the Destination Domain Allow List, enter your website domain. Eg: companyco.com
5. Click Add.
You can now add the Content Gating feature to your website by following these steps:
Step 1
On your Webflow Dashboard, click on the 3 dots at the bottom right of your project. Then, select Settings.

Step 2
Select the Custom Code tab.

Step 3
In the Head Code field, paste in the following script tag:
Note: If you have other Bread & Butter feature snippets, just add this snippet below them.

Step 4
Replace GATED_PAGE_URL with the page (or pages) you want to block unauthenticated users from visiting. Enter the URL like this:
["/work"]
Or like this for multiple pages:
["/work/project-1", "/work/project-2"]
You can also user a wildcard * to block all URLs under /work/, like /work/projects, but not including /work:
["/work/*"]
Replace REDIRECT_URL with the URL of the page you want users to be redirected to if they go directly to the GATED_PAGE_URL, from an external link. Enter the URL like this:
"/blog"
Step 5
Since the GateRoute snippet launches the 'Continue with' prompt, it also takes the same Options, which you can review on our Github. The Options are optional, but we recommend including the following so that the 'Continue with' launches with the blur screen focus:
show_login_focus: true
Step 6
Click Save Changes. Publish your website, when ready.